


I’m going to show you how to create a beautyfull porthole like this one with Adobe Photoshop :

Let’s start…
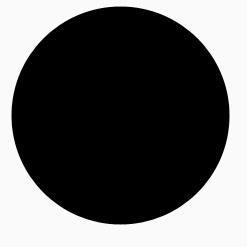
1. Create a new 250×250 pixel document and use the vectorial ellipse tool to draw a black shape like on the image
2. Double-click on the thumbnail of the layer to open its blending options window. Enter these settings :
Drop shadow:
Bevel and emboss :
Gradient overlay :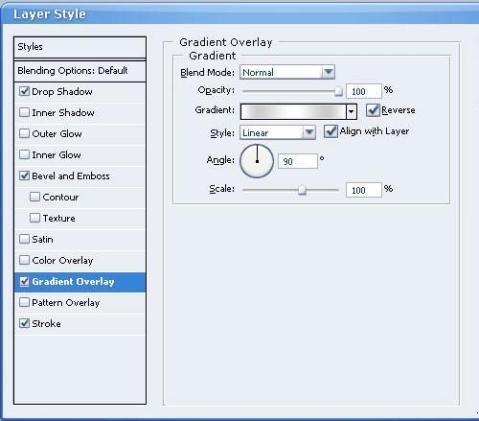
Using this Gradient :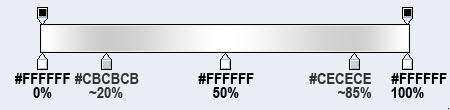
Stroke :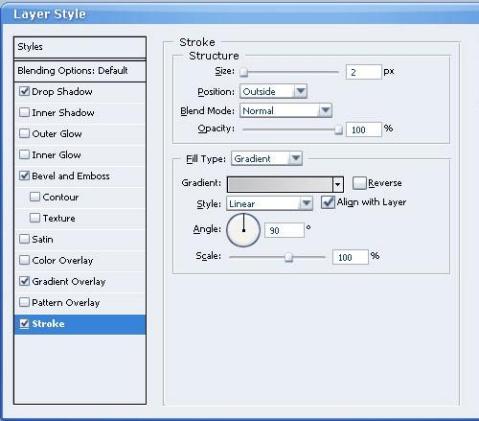
Using this gradient :
You should obtain this :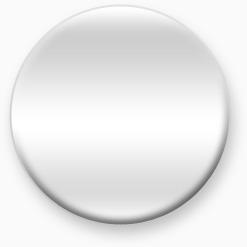
3. Use a Ctrl+Click on the thumbnail of the “Layer 1″ to have its shape as your selection. Then go to Select > Modify > Contract, and enter 7 in the newly appeared window.
Now create a new layer (Ctrl+Shift+N), and fill your selection with black. Then deselect (Ctrl+D). You should obtain this :

4. Then, double-click on the thumbnail of the layer to make its blending options window appear. Then, enter these settings :
Inner shadow :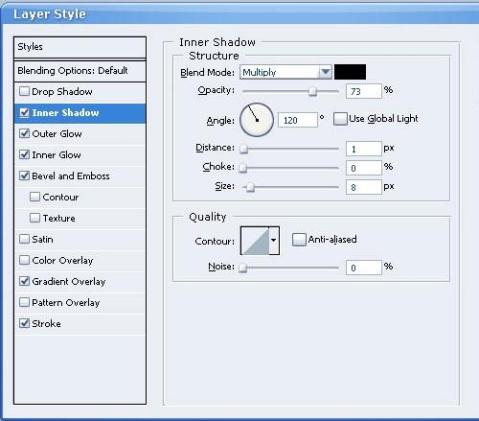
Outter glow :
Inner glow :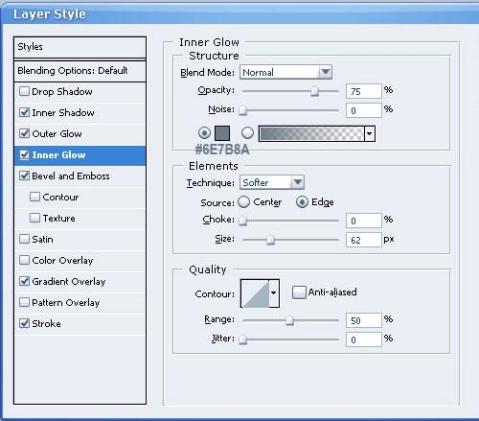
Bevel and emboss :
Gradient overlay :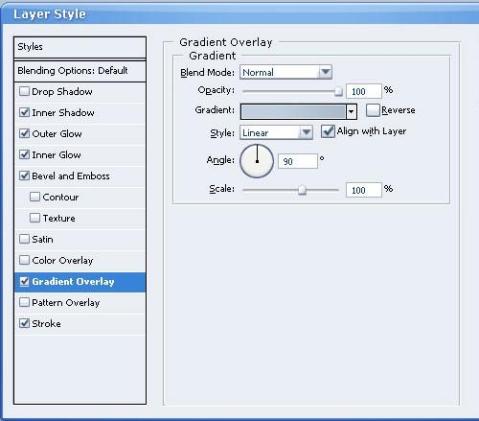
Using this gradient :
Stroke :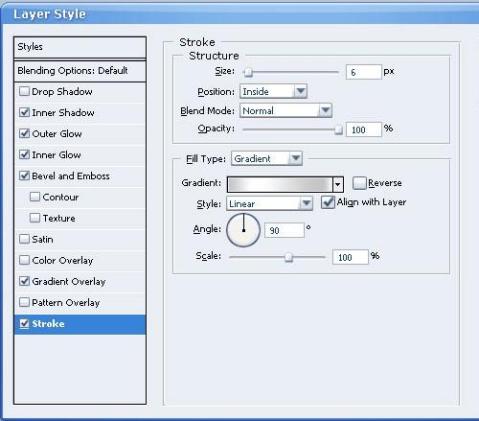
Using this gradient :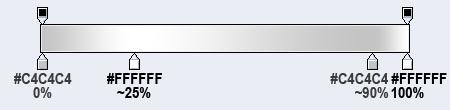
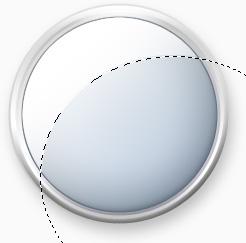
You should obtain this :
5. Ctrl+Click on thumbnail of the “Layer 2″, then contract the selection by 4 pixels (Select > Modify > Contract) and choose the gradient tool. Then set white as your foreground color, and select the “Foreground to transparent” gradient. Now, draw a gradient in a new layer (Ctrl+Shift+N) as shown bellow :

6. Create a new layer and fill the same selection with white :

7. Use the elliptical marquee tool to draw a selection like on the image, and press delete. Reduce the opacity of the layer to 40%. You should obtain this :
8. Then Ctrl+Click on “Layer 2″‘s thumbnail, and contract the selection by 4 pixels. Create a new layer, and fill your selection with white. Now use the elliptical marquee tool to draw a selection like on the image and press delete :

9. Deselect (Ctrl+D), and reduce the opacity of the layer to 20%. You should obtain this :

10. Put an image between layers 2 and 3, and reduce its opacity to 50% to 70%. Here’s the final result :

Here are some other examples of what you can do by following this tutorial :


No comments:
Post a Comment